I can't believe I have my new class coming on Thursday! EEK. I am trying to get my classroom organized and ready.. but it's slow going. It is so hard when you move to a new room and have to pack EVERYTHING you own! (How did I get so much stuff!?) Hopefully, I will be able to post a classroom tour soon. But I don't want to show you all my mess! Ha! Anyway, only have 1 made it this week because I have just been laminating and cutting all the fun stuff I bought at the TPT sale!
The first is for my house! I painted the inside of this piece of wood, garage sale find $2, with chalkboard paint. I'm not going to lie. I did this like 2 months ago. FINALLY.. I found some stickers that I like and finished up my DIY Menu Board for my kitchen! Love it! We have been really successful with planning out our weekly menu on Sundays. Then we don't have to have the whole, "What do you want to eat?" conversation, that leads to NOWHERE! We already know what we are having and have all the supplies! Hope I can keep this up during school!
Oh yes! And I posted about GROOVEBOOK a few months ago. Check it out here. I have since received 2 books full of pictures. I love it! Super cheap and I always have some up to date prints for frames or whatever! Here is the cute designs of my 2 books!
Showing posts with label diy. Show all posts
Monday, August 11, 2014
Sunday, August 3, 2014
Finally... The best DIY project of the summer!
I have been having so much fun making things and changing things in and out of our house this summer. Some things have been small and some bigger. But the BEST project, of course, was from Pinterest. And my poor hubby got roped into doing most of it! HA!
I posted this picture awhile ago on my Wordless Wednesday when it was still in the works. Now we are done and I'm read to share!
Ta Da!! Here is the end result!
A PALLET COUCH! IT'S AWESOME
Now for the materials and steps to complete this project.
(Some of these pictures are not in order. Hard to capture when your husband is speeding through it!)
Materials:
6 Pallets: We used 4 for the seating part and 2 were cut up for the back
(We got these pallets for free! I'm not going to lie.. I was stalking Craiglist.. they go fast!)
Watch the size of the pallets.. we used big ones and it was hard to find cushions!
6 Stainless Steel Rolling Wheels
Screws
Drill
Saw
Steps:
1. The base of the couch needs to have the same size of pallets because you will be stacking 2 on top of each other. .
2. We used some heavy duty screws to secure the 2 pallets together. (We had some "ugly" sections on these pallets, so they went on the bottom!
3. Then we attached 2 more pallets on top of these two.
4. Next, my husband attached the wheels to the bottom. We used 6 wheels because it was so long and I wanted to be able to move it around the patio. We did one wheel in each corner and 1 in the front and back of the middle.
4. Then, we cut up 2 pallets to create the back of the couch. Again, secure them with heavy duty screws.
5. We did add some extra pieces of wood in some of the slats to sturdy up the couch, but yours may be different. We just used extra pallet pieces as you can see in the picture.
6. Voila! We were done! Now to find the cushions.
The HARDEST part of this whole thing was finding the cushions. Who would've thought! I did not want to spend a bunch of money on cushions, because this was supposed to be a basically free project (minus the wheels). After we finished building we had about 90 inches in length and about 40 in width. Not your typical cushion size.
I looked online.. nothing.
I looked in the stores.. nothing.
I went to the craft stores to look at foam and fabric... WAY too expensive.
Finally.. at good ol' Walmart I found some lounge cushions that I thought could work. But still not super cheap! At least they were on summer clearance.
This is still a work in progress. I am going attach some velcro to the couch and cushions so that they don't slip all the time. And I am going to make a small drink tray to sit on the side where the cushion doesn't reach. I will update with that when it's done. But it may be awhile we are worn out!
But overall.. I love it! Thank you Pinterest!
Friday, July 18, 2014
Five For Friday
It's already Friday again! Can't believe how fast my summer is going. Hop over to Doodle Bugs to link up!
We finally finished our deck! So this week we started staining! It has been so nice out so we figured we better get it done. We are using a clear stain, not a lot of color but hopefully it will last awhile.
Baby is 3 months old! I can't believe how fast time is going!
Apparently staining is on my mind lately! I started preparing my cabinets to be stained also. I can't stand this yucky color any longer! Right now, I am on the second coat of stain. Not sure what I think about it yet.. hmm. Hopefully it will turn out good!
The weather has been AWESOME this week! We never get summer weeks in Kansas where the weather is in the 70s! Ah so nice! So we celebrated with a walk! He is just so cute in his hoodie!
Last, my husband and I have become obsessed with NCIS. I have never watched it before this summer. And we are hooked! We have been watching it every night during dinner! HA!
Can't wait to read your post!
Wednesday, July 16, 2014
Wordless Wednesday July 16th
Head over and link up with Miss DeCarbo!
HMM... Stayed tuned for the finished product!
(PS. My husband is doing all the construction! He hates when I get on Pinterest)
What DIY projects are you working on?
Monday, July 7, 2014
Monday Made it!
Wow. What a weekend! Spent from Thursday to Sunday at the Lake, and I'm happy to say I have somewhat of a tan! Yay!
Here is a quick picture of my baby in his patriotic gear! This is the pallet I painted last week!
The 4th of July inspired my made it for this week!
Now on to my Made its with Fourth Grade Frolics! Love this linky!
Check out this adorable bowtie I made for his July 4th Outfit! I really got back into crocheting the last few weeks I was pregnant because I needed something to do! :) They are super easy to crochet!
So I decided to make a few more for him to wear during the holidays! I've made 2 Halloween themed and one Christmas so far! (One of them is not done yet!) I love them!
Last, I whipped up a holiday hat for Ryder for Christmas. I made lots of hats for his newborn photo shoot, but now he has grown out of them! There is a great pattern to make this from RepeatCrafterMe. Check it out there are tons of cute, free patterns!
That's it for this week! Can't wait to find some more project on your Monday Made it!
Monday, June 30, 2014
4th of July Monday Made it!
This is my favorite Monday Made it yet! Make sure you link up!
This is my favorite project so far! I have seen tons of pallet projects on Pinterest! My friend and I finally decided to make one! This is just in time for July 4th and SO EASY!
All you need is a pallet (which you can find for free), red, white, and blue paint, and a star stencil! We used small rollers for the red and white, and then painted on the blue! It took maybe 30 minutes!
Here is our before and after pics! I love how our different pallets made a different look!
I love how this looks with my flowers in front! Happy 4th!
My mom HAD to have one for the lake, so here it is!
I have been working on this project for what seems like forever! I wanted some cute flashcards for the Fry Hundred Word lists. So I created some! And they come with the cards for the game BANG, which my kids love! I like having all the sets because then I can differentiate words for each student! I made a bundle or there are individual sets! Check them out at my store!
Last, is a cheap easy picture frame! I purchased some $1 frames from the Dollar Tree. LOVE! And then painted it to match my photo! I just love the orange! Isn't my little dinosaur cute!?
That's all for now! So excited to see other Made its!
Monday, June 16, 2014
Monday Made It
Wow. I cannot believe how long I have been away from my Blog! I guess that's what having a baby will do to you!

Meet Baby Ryder! My first MMI is a Father's Day Present for my Husband! So fun! All I did was paint these letters and take the pictures. I love the funny faces!
My 2nd MMI is something that I have had sitting around for awhile and I finally finished! I started my Road Trip Theme last year and absolutely love it. I will be continuing it this year when I move to 3rd grade. I am going to use these for bulletin boards and for my students' names. These are now available in my store.
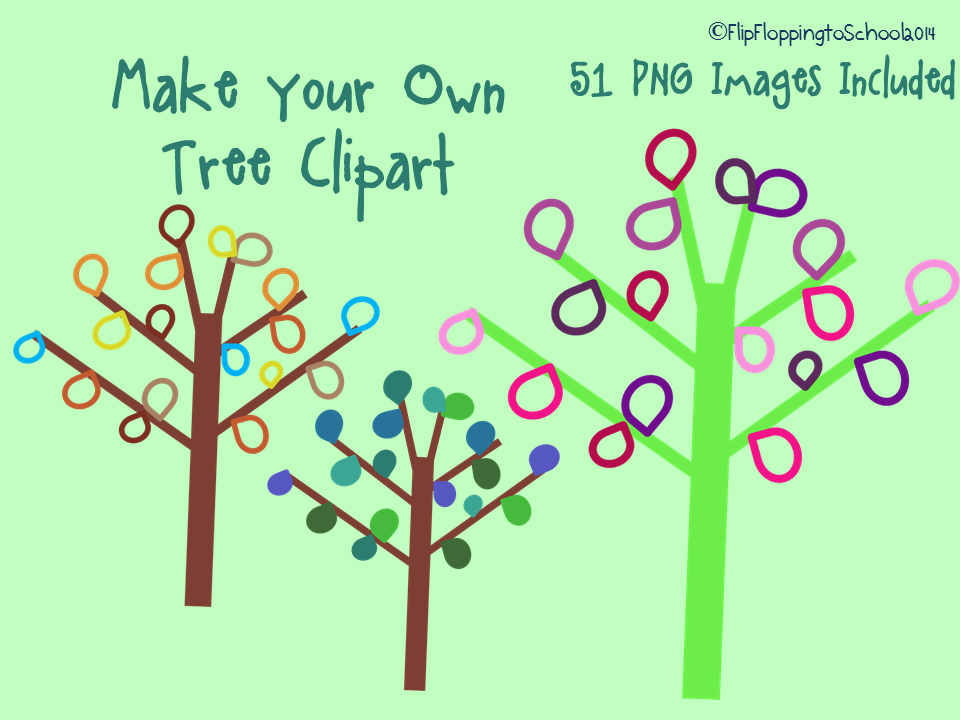
MMI 3 came from an idea I got from my son's nursery decoration. We used a big vinyl tree decal to put on his wall. I thought this would be a great idea for a classroom. These would be great to use for a Class Tree, or a Thankful Tree bulletin board or clipart! Check out my store to see more.
I'm so excited to see all the other MMI's today! I love summer! Head over to Fourth Grade Frolics to check them out!

Subscribe to:
Posts (Atom)