Showing posts with label blogging. Show all posts

Tuesday, July 23, 2013

Classroom Makeover Day 1!

Wow, I can't believe that I have only 2 weeks left before I am back to work. AHH!! So I decided to join Kimberlee for her Teacher Tour Tuesday, which is great because it forced me to get up to my classroom and get busy! My Instagram video is a little rough, need more practice with it! :) Hop over to her blog and check it out!


Here is a look at what I came back to. Everything put away and white walls everywhere! Yuck!


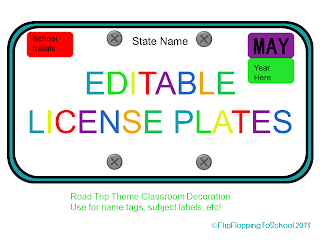
For the last 2 years, I have gone with a beach theme. This year, since I am looping with my class I decided that we needed a change and my new theme is.... ROAD TRIP!! I've become so excited about this theme! There are some ideas out there for this theme but not a ton, so I hope my post will help anyone wanting to try it out!

The first thing I wanted to get done was covering my bulletin boards with fabric. I bought fabric last summer from JoAnn's in a few different colors, you'll see soon that I like everything BRIGHT!

 
This is the wall right behind my small group table. I created a "bulletin board" here so I can show things we are working on in guided reading and math.

 
Now, we are looking at the board right above my carpet/meeting area. This is where my student work will be displayed. I found this great border with exciting places all over the country! Come back to see the cute name plates we will be making for each kid!


Check out this adorable Road Trip fabric I found at JoAnn's. I'm in love with it! Get your kicks on Route 66!

 
Lunch Count! I created these suitcases on my handy, dandy, Cricut! (Best present ever, Thanks Mom!) I am using numbered sticks for the kids to pick their lunches. All they have to do it put it in the correct fry box! What kid doesn't love McDonald's!


Here is my window to our pod! I cut out these Chevron pennants on my Cricut and then put 2 hole punches in the corner and strung it up with ribbon! The road border came from a bulletin board set that I purchased!

If you want some printable pennants/bunting check out my TPT store.


Front door of classroom! I made license plates for each one of my students for the year! See the picture below to see what they look like!


Here is where I will be putting my Learning Targets for the day/week. I love how these license plates turned out. Check out my TPT store to purchase the editable template!


 I also got my word wall put up today! See my word wall post here.
 

Here is my attempt at uploading a video to my blog! I couldn't get Instagram to work for me! I will try that again later! Any suggestions are welcome!

Here is a 360 of my room in the middle of my day today!

Hope you enjoyed my tour for today! Hopefully, I will have more next week!


Saturday, July 13, 2013

Diy Wedding Calendar

Pinterest has become my main addiction in the past couple of years. You can find anything on there! I love to craft and I have found some great ideas to tweak for myself. I plan to share some of my past DIY projects and my new ones! Hope you enjoy!

My best friend's wedding, love that movie, was this June. We had so much fun! Before I headed up for it, I wanted to make her and her husband something special for their married life. I saw this great idea on Pinterest to make a calendar that you can write memories on each day. Then the next year on the same day you can read the memory you wrote. I thought it sounded like so much fun!


Here is the original post, http://www.designsponge.com/2010/12/diy-project-vintage-postcard-calendar-journal.html

So I gathered all my supplies. Sorry I don't have pictures of the process!

Here's what you need:
- Notecards, cut in half (I got the colored ones!)
- Colored cardstock
- a cute box (love the Dollar Spot at Target)
- an old calendar, post cards, etc (something you can cut up)
- Markers or sharpies to write with
- Scissors
- Glue

Step 1: Cut all the index cards in half (or you can leave them whole if you have a big box) and write each day on one card. I just wrote Jan. 1 in the top right corner and continued on! Don't forget leap day! Then I filled in 2 of the lines with the year. Then the family would write next to each year. Example: January 1st went to a New Year's Eve Party!

You might think this part might take awhile but it really goes fast, especially if you are watching a great show, like The Big Bang Theory!


Step 2: I made the Month cards to separate my index cards. I used colored cardstock and then used markers to write the months. I had an old calendar that I cut pictures out of to make them more exciting!

Step 3: I chose to make a "Today" marker so that it would be easy to keep your place!


Step 4: In the front I added a simple note with instructions for the newlyweds!


And there you have it! A simple, unique wedding or shower gift for the happy couple! Very inexpensive, most of the supplies I already had on hand. Now I need to get to making one for myself!

Thanks for stopping by!

Kerry