Showing posts with label chevron. Show all posts

Monday, August 5, 2013

Monday Made it!

I am linking up with Tara over at Fourth Grade Frolics for this fun linky!


Hello Teacher Toolbox!
So excited about this. Head over to Fun in Room 4B to get the free template!  So easy to make. First, I sprayed painted the ugly gray plastic with bright pink! Then all I did was tweak the labels to fit my needs and printed them out on my cute Chevron paper! And done!
 

The next thing I finished up is something my teammate and I put together last spring for our computer lab! It was so boring before we jazzed it up! My favorite part of it is the GIANT KEYBOARD! AHH!
 I found this great idea for a giant keyboard here.
Here is our finished project! The kids LOVE it! (Almost too much, we had to tell them not to actually punch the keys!)

Here is what we did:
First, we got some take out containers and cut them in half. (Thanks to my brother and our neighborhood restaurant for the donation!) We used about 74 halves. So maybe ask for them to donate about 40 boxes.

Next, we needed to make our letters and numbers. This proved to be the most time-consuming part of the whole thing! So I decided I would put them together in one document for you! Click here to get it from my store! I have a colored version and black and white version. We do not have access to a color printer we used regular construction paper and cut it so it would fit in our copier!

After we printed them out, we cut and laminated them all. See below.

Now we were ready to put it together. We started from with the second row from the bottom because we did not have to cut any of the boxes! After putting up some butcher paper behind, we stapled the "keys" to the wall first. For some boxes we used 1.5 boxes or 2.

 
Then it was time for the fun part! We got some extra sticky glue from our art teacher and began sticking them up! I had to use tape on the corners to keep the paper on until it dried. **Hint. I would suggest laminating the keys that have several pages together, like the space bar, so it is easier to glue to the boxes. (You will see I have a few I need to fix!)
How cute is this!?

SOO I decided to put all of this work into one document for sale on my TPT store! It will be so easy for you to print out and put up! It even has directions!


 I also got started picking out Math Vocabulary for this great word wall! Thanks Run! Ms. Nelson's Got the Camera! See my word wall post here.


AND I saved the best for last!
The last thing I have figured out how to do is throw a Sale at my TPT store! Since its my last few days before I head back to work I figured this is a good way to end my summer! Check out my store for all my fun creations at 15% off! My new Giant Keyboard Project is on sale too!

Thanks for stopping by!


Tuesday, July 23, 2013

Classroom Makeover Day 1!

Wow, I can't believe that I have only 2 weeks left before I am back to work. AHH!! So I decided to join Kimberlee for her Teacher Tour Tuesday, which is great because it forced me to get up to my classroom and get busy! My Instagram video is a little rough, need more practice with it! :) Hop over to her blog and check it out!


Here is a look at what I came back to. Everything put away and white walls everywhere! Yuck!


For the last 2 years, I have gone with a beach theme. This year, since I am looping with my class I decided that we needed a change and my new theme is.... ROAD TRIP!! I've become so excited about this theme! There are some ideas out there for this theme but not a ton, so I hope my post will help anyone wanting to try it out!

The first thing I wanted to get done was covering my bulletin boards with fabric. I bought fabric last summer from JoAnn's in a few different colors, you'll see soon that I like everything BRIGHT!

 
This is the wall right behind my small group table. I created a "bulletin board" here so I can show things we are working on in guided reading and math.

 
Now, we are looking at the board right above my carpet/meeting area. This is where my student work will be displayed. I found this great border with exciting places all over the country! Come back to see the cute name plates we will be making for each kid!


Check out this adorable Road Trip fabric I found at JoAnn's. I'm in love with it! Get your kicks on Route 66!

 
Lunch Count! I created these suitcases on my handy, dandy, Cricut! (Best present ever, Thanks Mom!) I am using numbered sticks for the kids to pick their lunches. All they have to do it put it in the correct fry box! What kid doesn't love McDonald's!


Here is my window to our pod! I cut out these Chevron pennants on my Cricut and then put 2 hole punches in the corner and strung it up with ribbon! The road border came from a bulletin board set that I purchased!

If you want some printable pennants/bunting check out my TPT store.


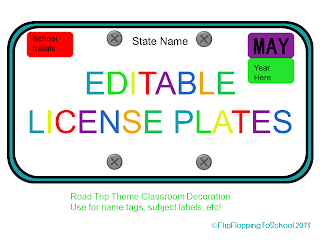
Front door of classroom! I made license plates for each one of my students for the year! See the picture below to see what they look like!


Here is where I will be putting my Learning Targets for the day/week. I love how these license plates turned out. Check out my TPT store to purchase the editable template!


 I also got my word wall put up today! See my word wall post here.
 

Here is my attempt at uploading a video to my blog! I couldn't get Instagram to work for me! I will try that again later! Any suggestions are welcome!

Here is a 360 of my room in the middle of my day today!

Hope you enjoyed my tour for today! Hopefully, I will have more next week!


Chevron Movable Word Wall

I'm so addicted to Pinterest! As I was looking for new things to add to my classroom I found this great word wall idea over at Run! Ms. Nelson's Got the Camera! Check out her blog post here.
 
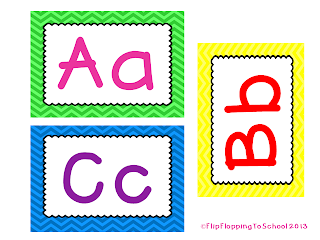
So I decided to make my own to go with my new classroom theme! Chevron is great for my theme! I love these papers by Ashley Hughes! She is amazing!  If you would like to purchase these word wall cards click here.


I printed these out, laminated, and punched a hole in the corners. I got some 1 in book rings, you could get larger ones if you want more space, and put them on each card.

Then, I purchased some small command hooks from Walmart. There were like 40 in a pack so I had plenty! I thought they would fit perfectly under my white board.
 
Here is a close up!


Finished! Now, once we start school and vocabulary lessons we can clip our index cards to their appropriate letter. I am planning on having the vocab. word on the front and the definition on the back. I'm hoping to use these for writing purposes as well as reviewing our new words.  
 
 
Hopefully, once school starts I will be able to tell you how wonderful this word wall is! Thanks again to Ms. Nelson at Run! Ms. Nelson's Got the Camera for this great idea!